All-in-one real estate solution


eGO Academy › 10 Essential Steps › Step 5: How to Create Tags
Tags provide a useful way to identify and create a specific group of properties, contacts and/or opportunities. Tags make searching for data in eGO Real Estate easier and more organized.
By clicking a tag, the application automatically filters properties, contacts or opportunities with this tag associated.
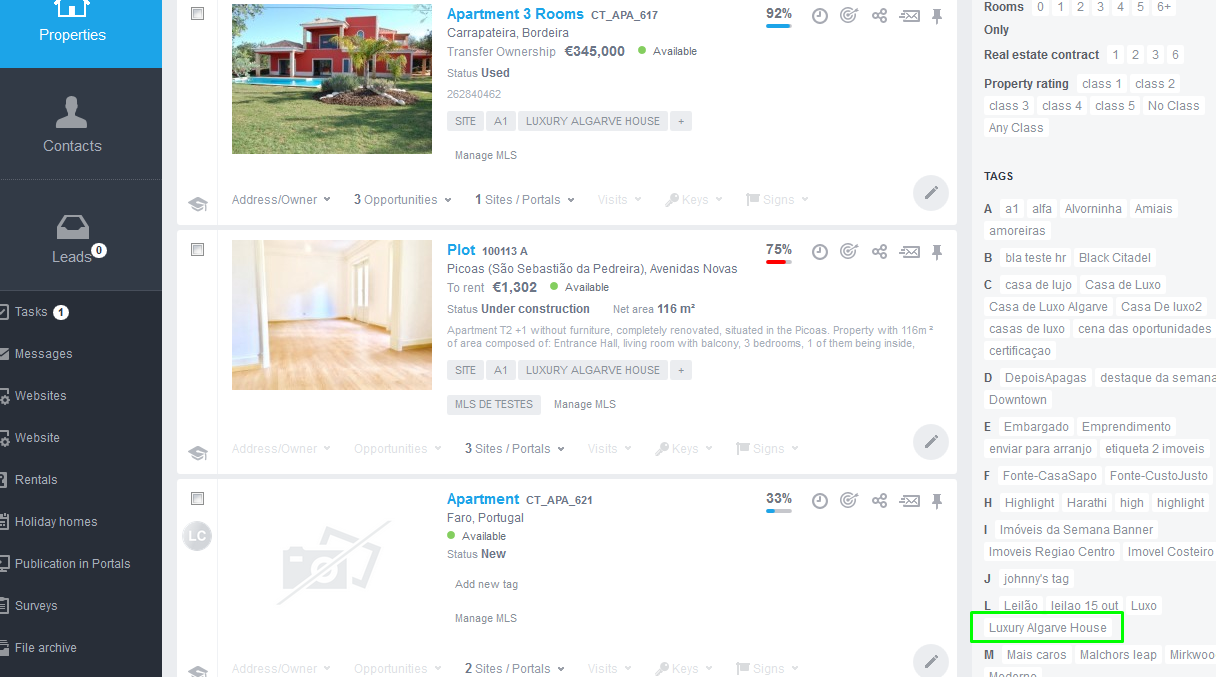
Tags are found in the lateral sidebar of “Properties”, “Contacts and “Opportunities” tabs. Only existing tags are available in the ‘Tags’ area but new tags can be created anytime.

To associate several properties to a specific tag, take the following steps:
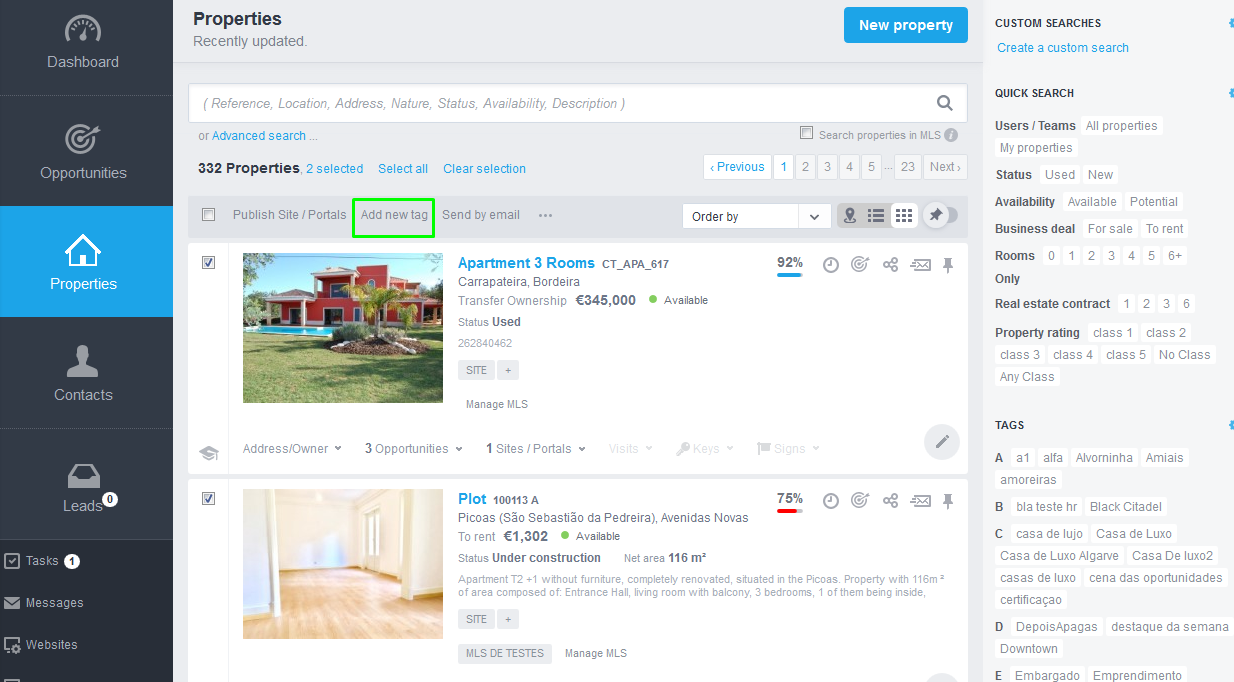
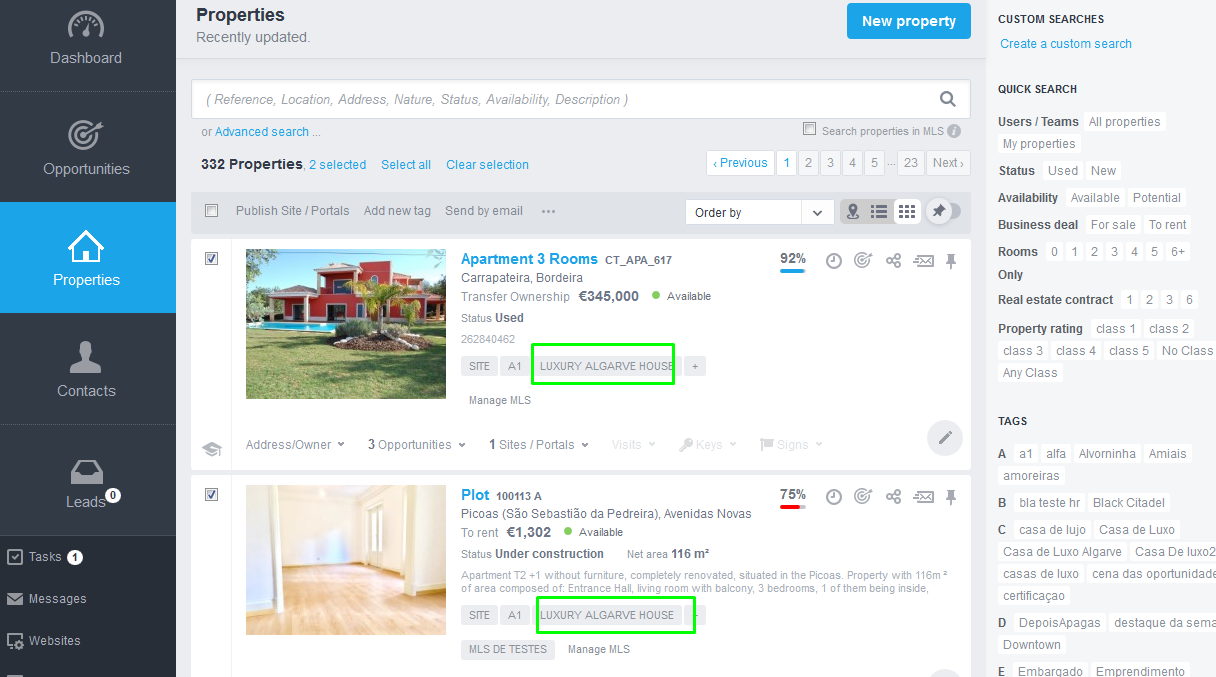
Open “Properties” tab and select the properties you want to add a tag;

On top of the property list, click “Add new tag”
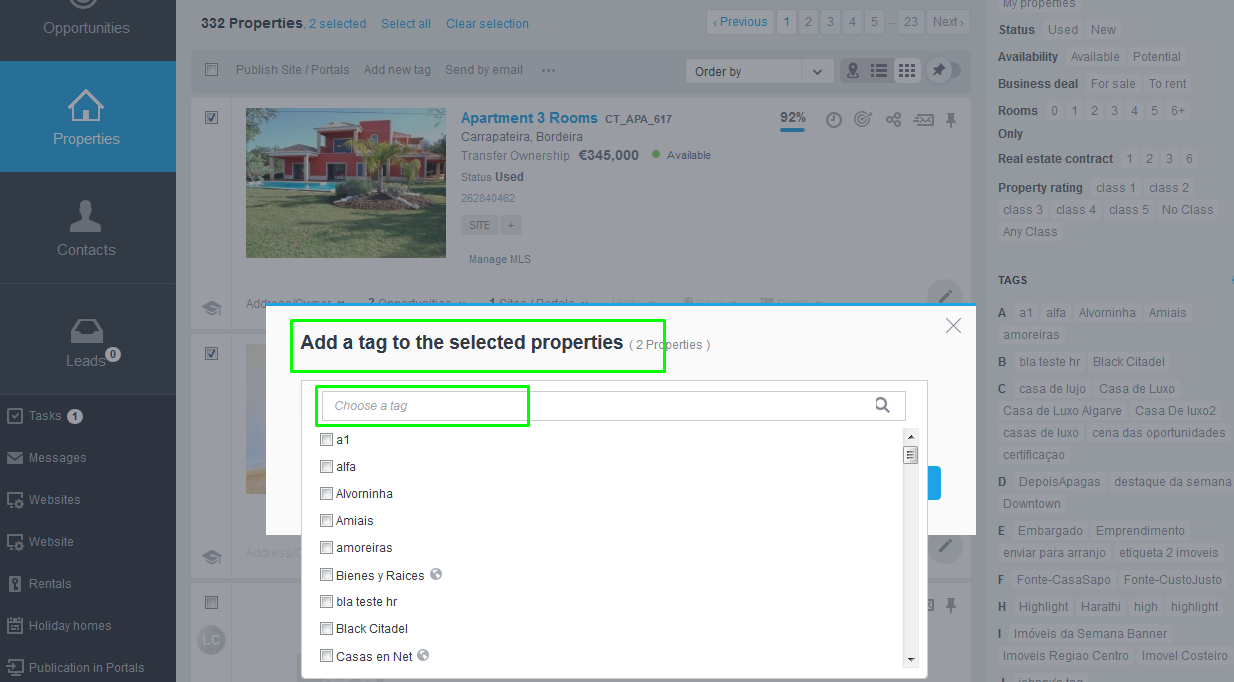
You can select an existing tag or create a new one. Enter the name you want to give the tag (for example: Luxury Algarve House) and click the “Insert Label”
When the following information appear “Properties have been tagged with the selected tags”, clique “OK”
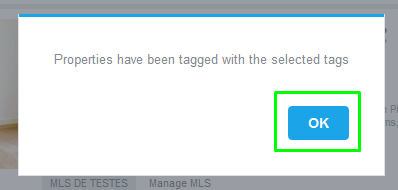
All the properties selected will be associated to that tag when viewed in the “Properties” tab;
To know which luxury villas are in the Algarve area, select the tag created (Luxury Algarve House), wait a few seconds and all the properties associated with that tag will appear in the property list;
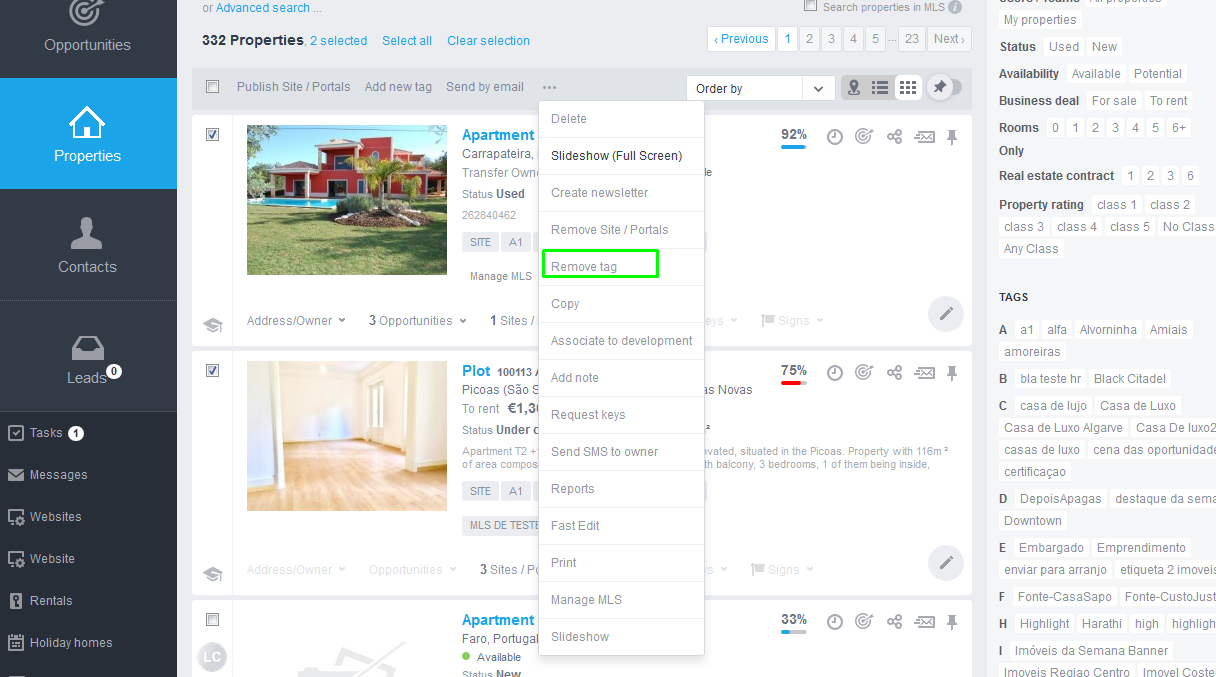
To remove the tag associated with the property, select the property and in the button choose … “Remove tag”;
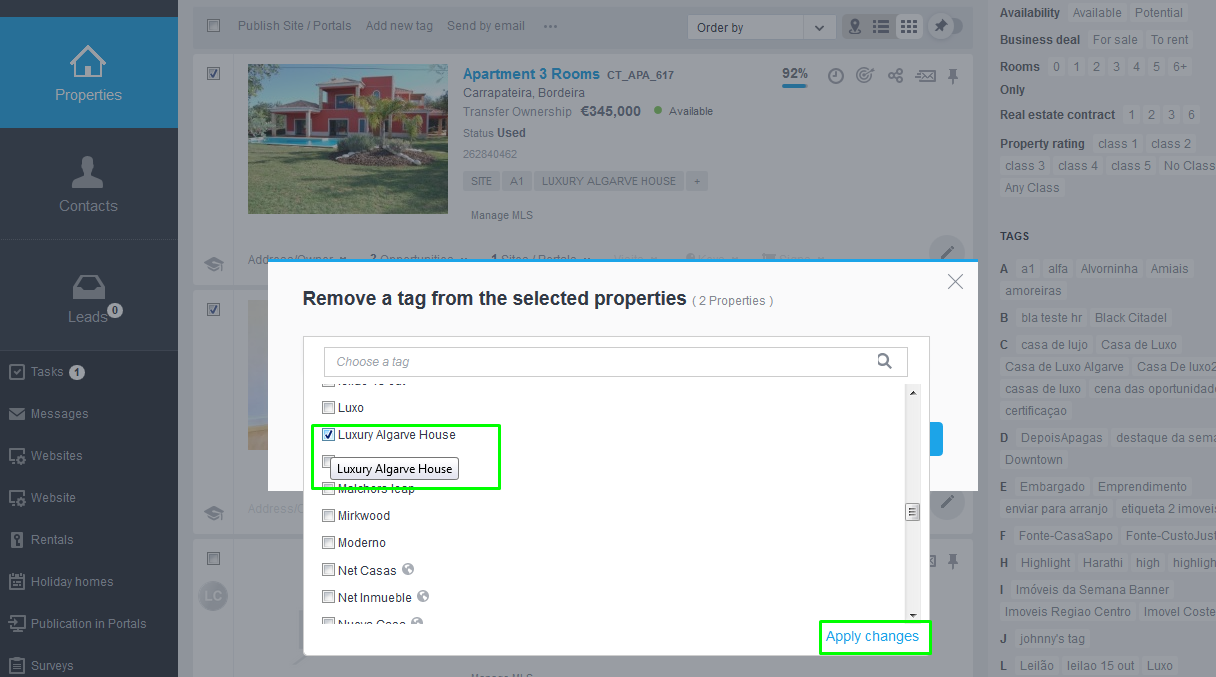
Choose the tag you wish to remove and clique “Apply changes”;
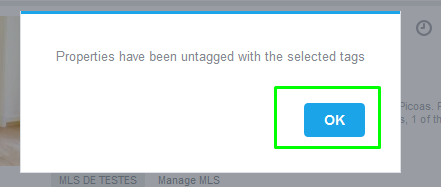
When the following message appears “Properties have been untagged with the selected tags”, clique “OK”.
The tag will no longer be associated with the selected real estate.