All-in-one real estate solution


eGO Academy › Real Estate Software › Google Ads integration with eGO Real Estate CRM
Simplify and work only from your eGO. Google’s paid adverts allow you to create lead forms.
Activate this integration with Google Ads, optimise your time and receive leads directly in eGO where you can monitor results.
In order to take advantage of this feature – creating lead forms in paid adverts – you also need to comply with Google’s various rules and requirements.
Here’s how you can create the forms and the requirements you need to fulfil (this is an external link to eGO, so we are not responsible for the information contained therein): https://support.google.com/google-ads/answer/9423234?hl=en-gb
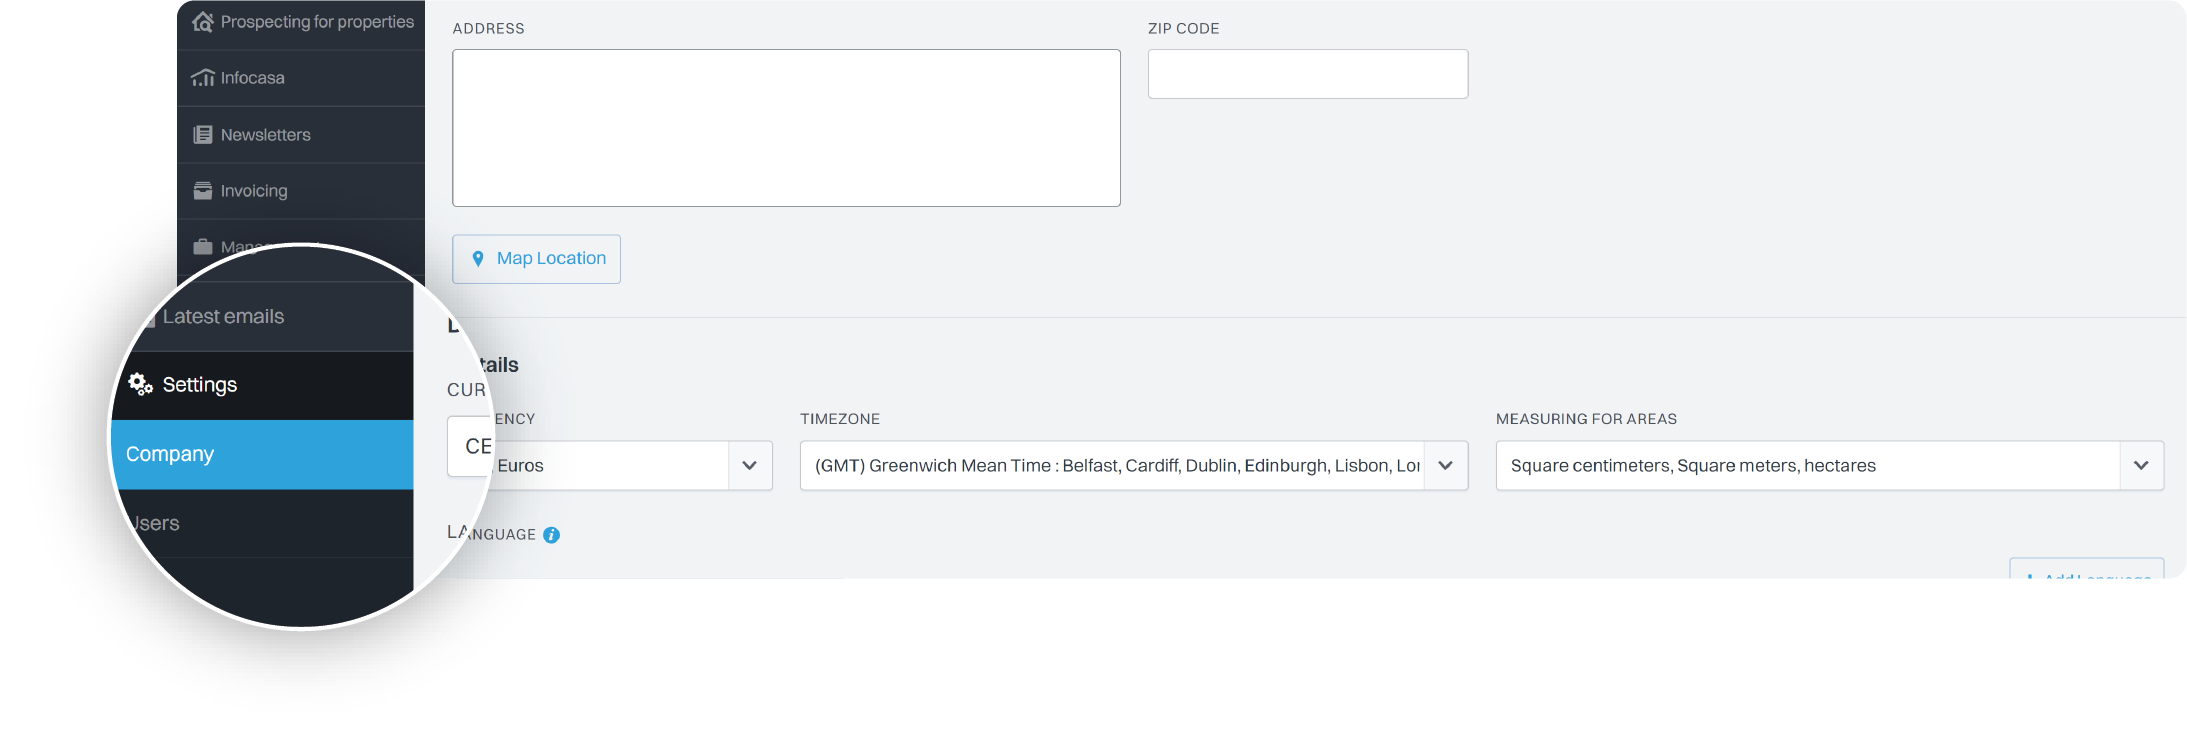
1. Go to eGO settings and then Company:
2. Open the External Integrations tab;
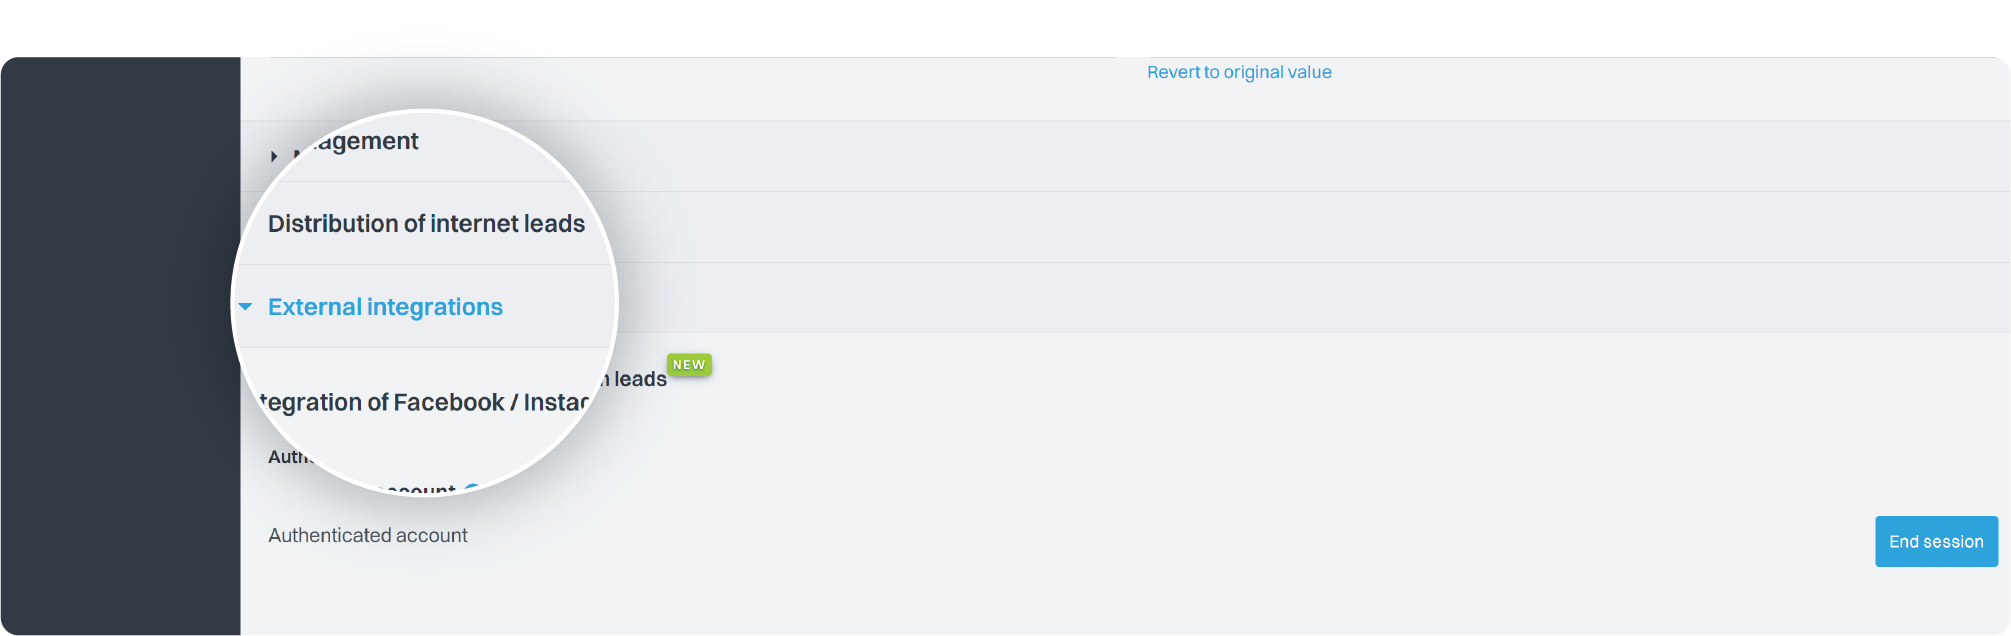
3. In the Google Ads section;
2 options appear:
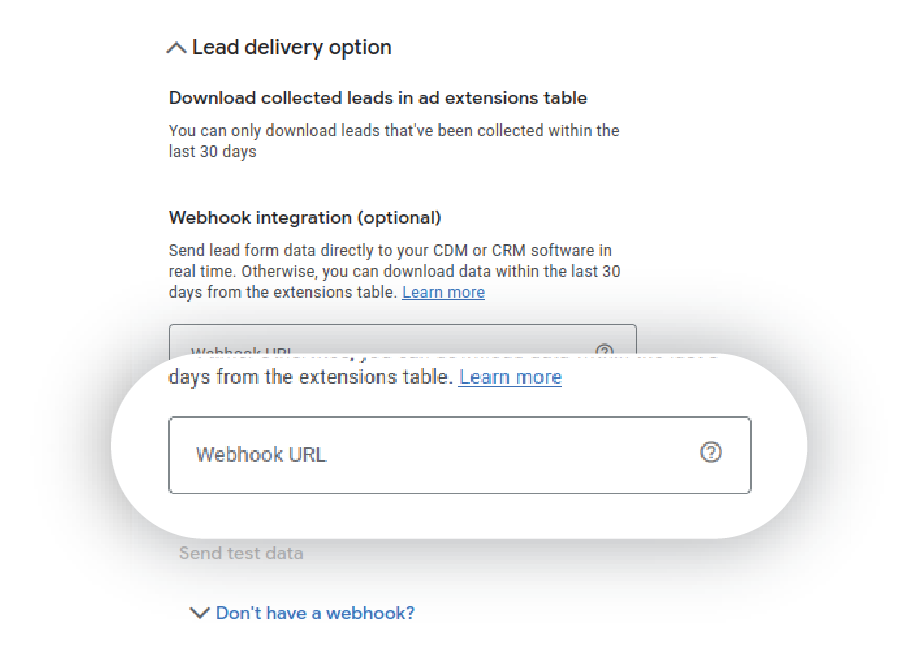
1 – Webhook
The webhook is a URL that must be placed within a specific section of the Google campaign settings with form.

Note: This URL is unique per eGO client and is always the same for all campaigns created on Google.
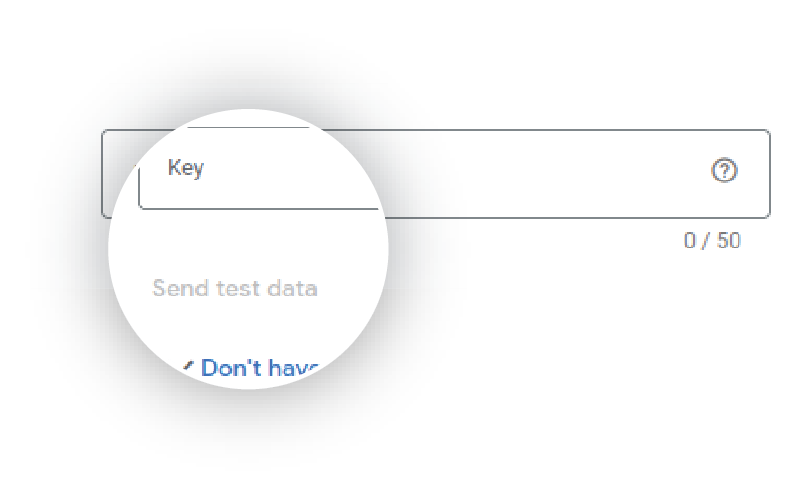
2 – Google Key
This is the key that identifies each form and is used to validate leads.

This key is chosen within the Google form campaign and must then be entered into eGO in the relevant section.
Please note: If a form has a key and this key is not entered into the eGO, the lead from that form will not reach the eGO.
Note: New keys created in Google must always be added to the eGO.
To ensure that you access all your Google Ads leads in one place, you need to create a Google Ads campaign with a Lead Form and associate the necessary data to the eGO.
To do this, you need to carry out the following steps:
4. Create a Google Ads campaign with Leads Form;
1 – When adding the Leads Form, make sure that the necessary fields are filled in correctly and that you select the contact options you want to receive from your potential client.
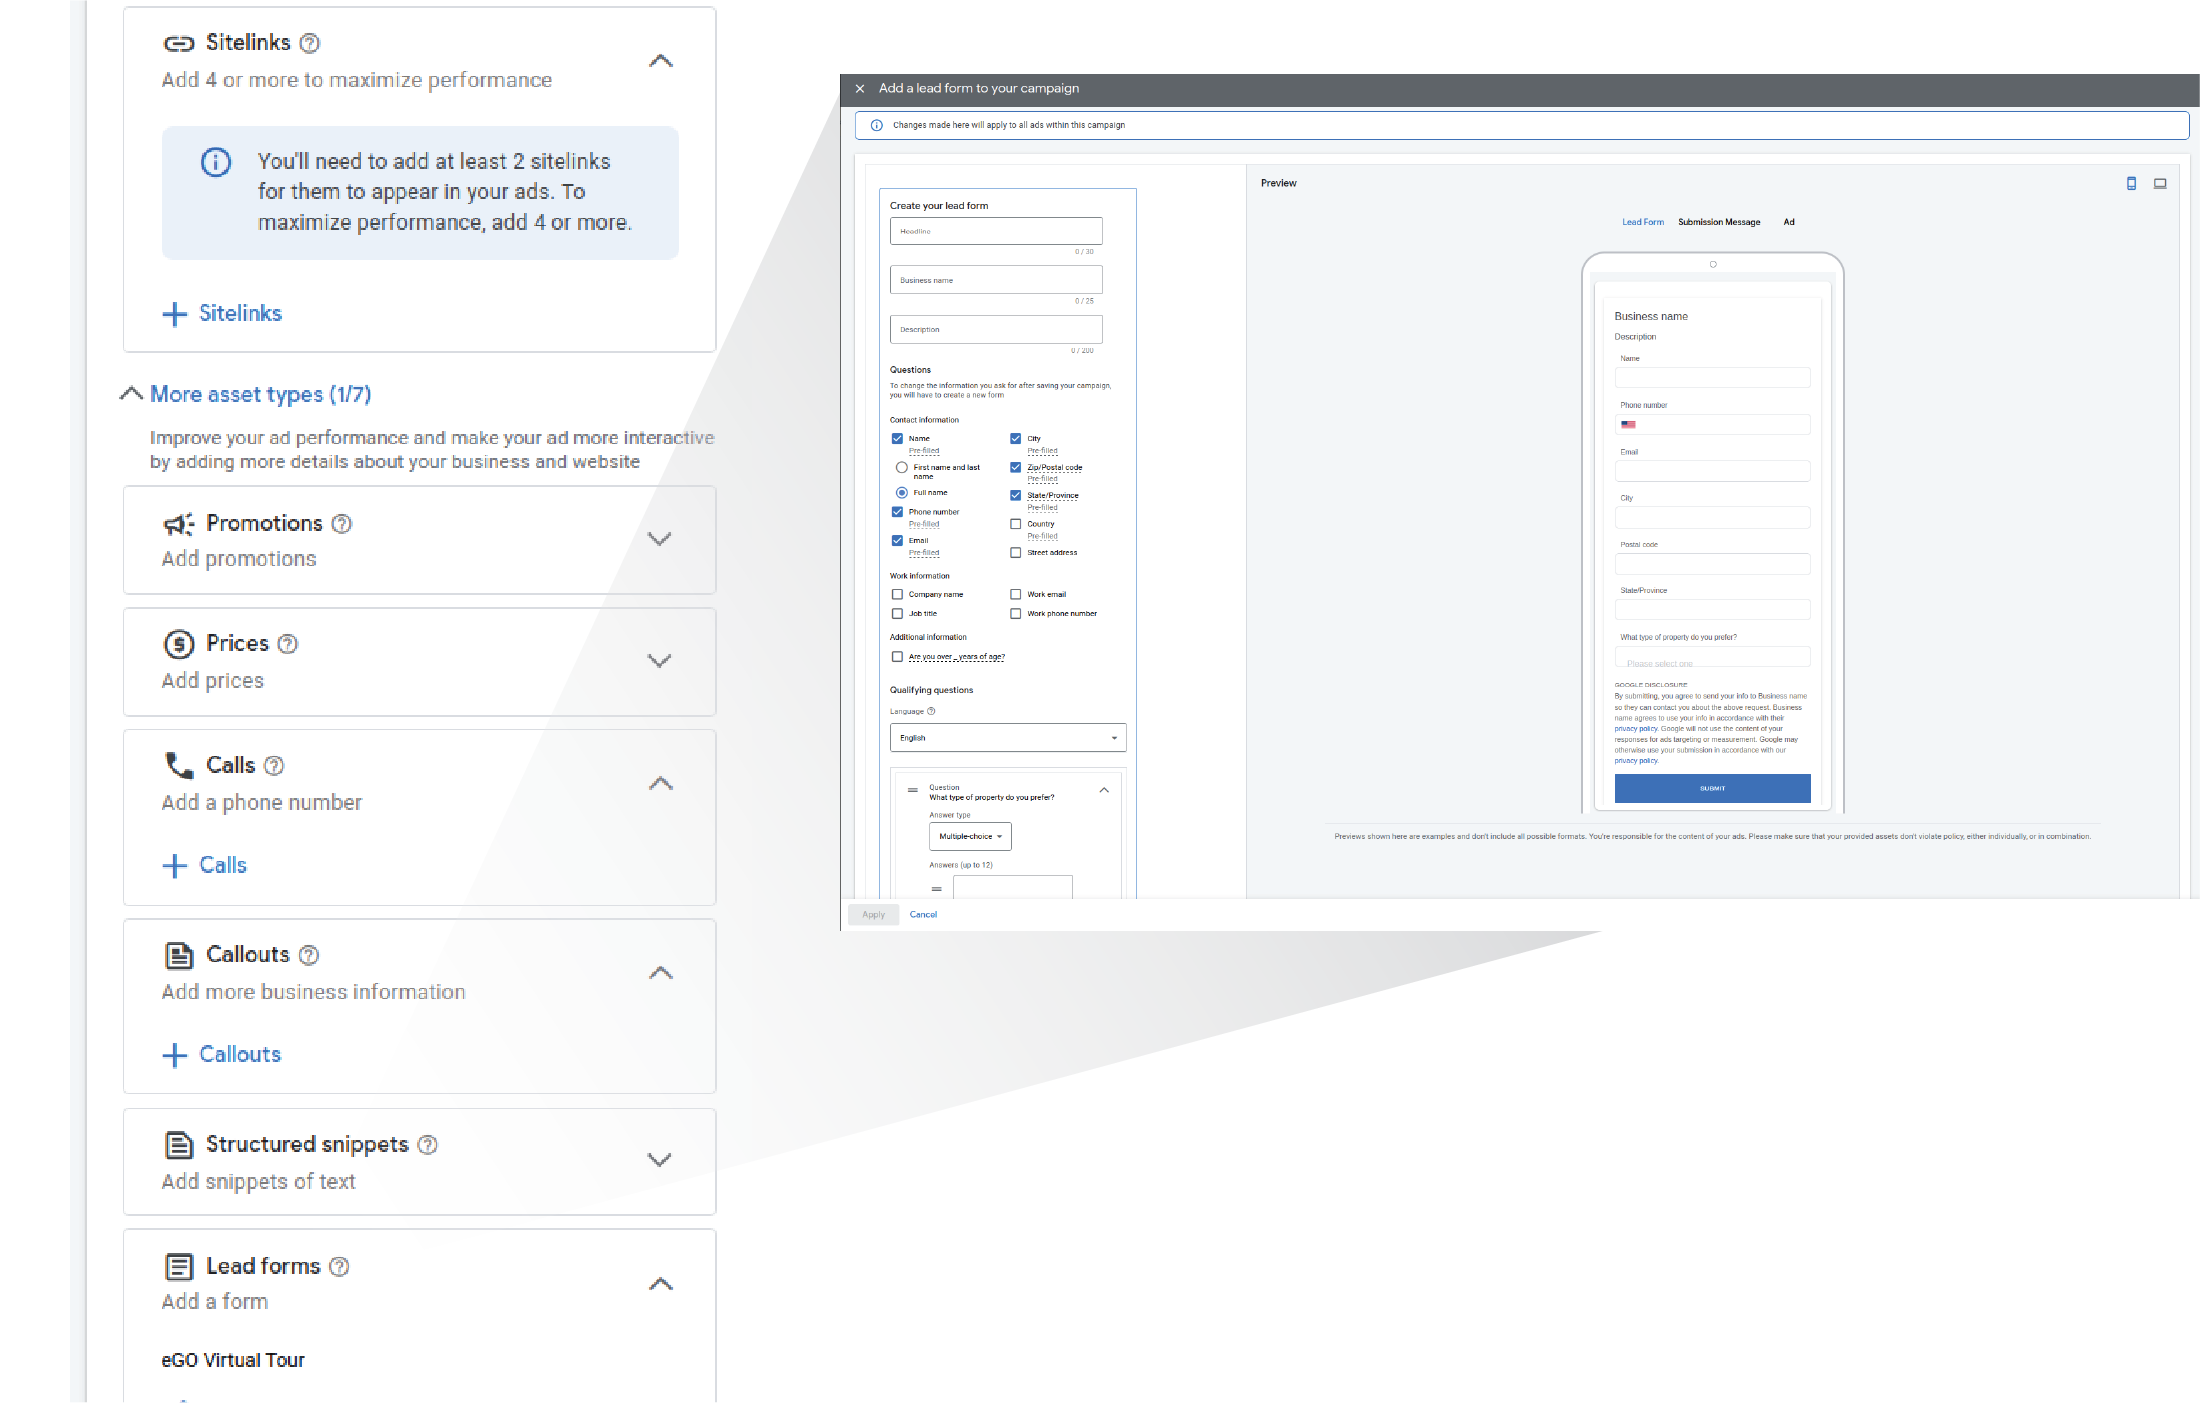
2 – Within the campaign, in the ‘Leads supply option’ section, place the webhook that is in the eGO and choose the Key. This key must be entered in your eGO settings.
3 – You can then generate a test lead by clicking on ‘Send test data’, this test will appear in your eGO after a few minutes.
Once you have completed this configuration and testing, the link between that form campaign and the eGO is ready to be used.
5. What will appear in your eGO;
1 – Leads
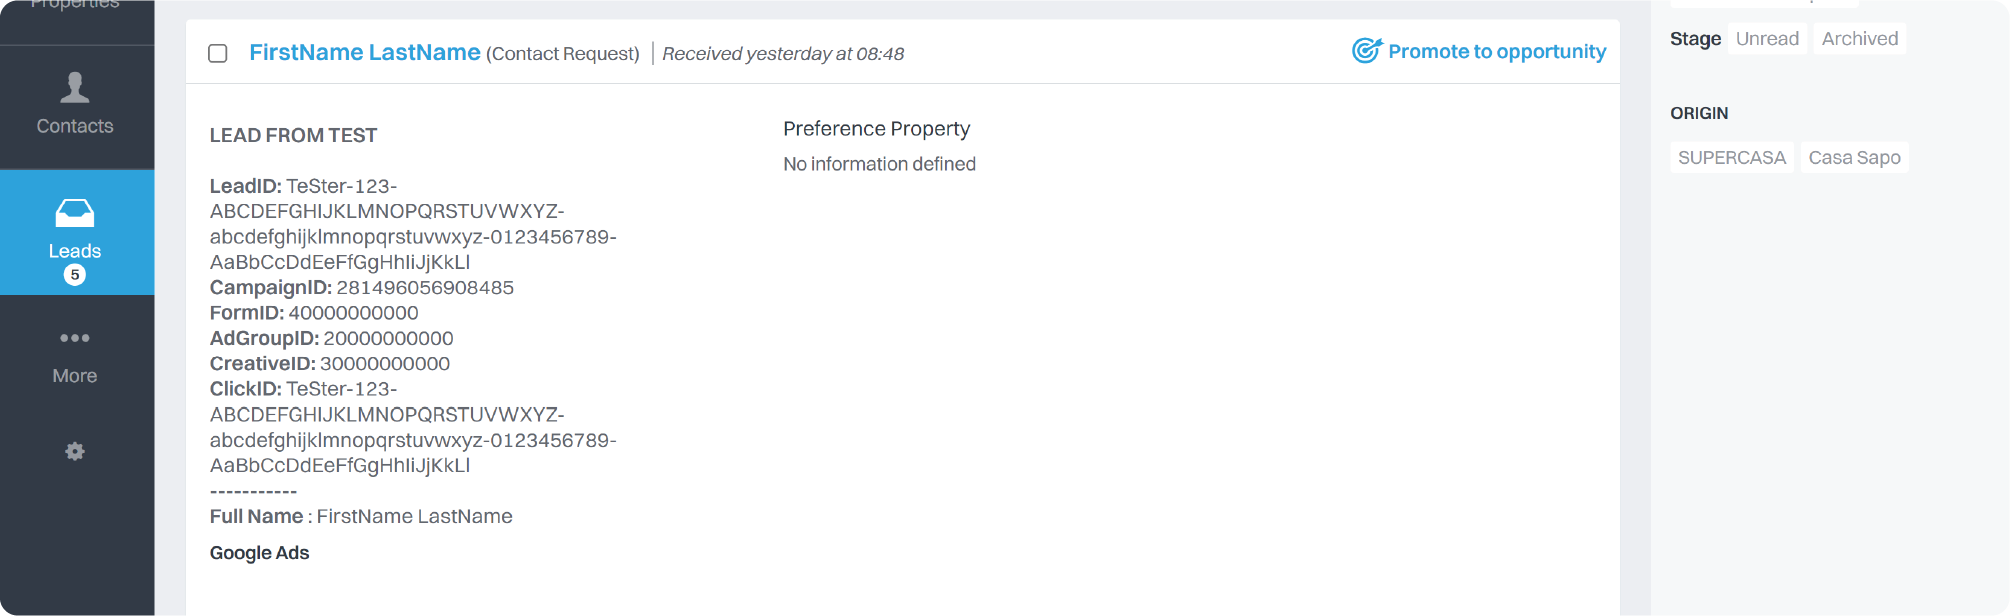
The generated leads will appear when they enter the eGO with the following rules:
– Lead type: Contact request
– Source: Internet
– Sub origin: Google Ads
– Lead data: all the fields available and filled in on the Google form will appear in the lead generated on your eGO.
This way, you have all the information in the eGO that Google provides for these leads via the form.
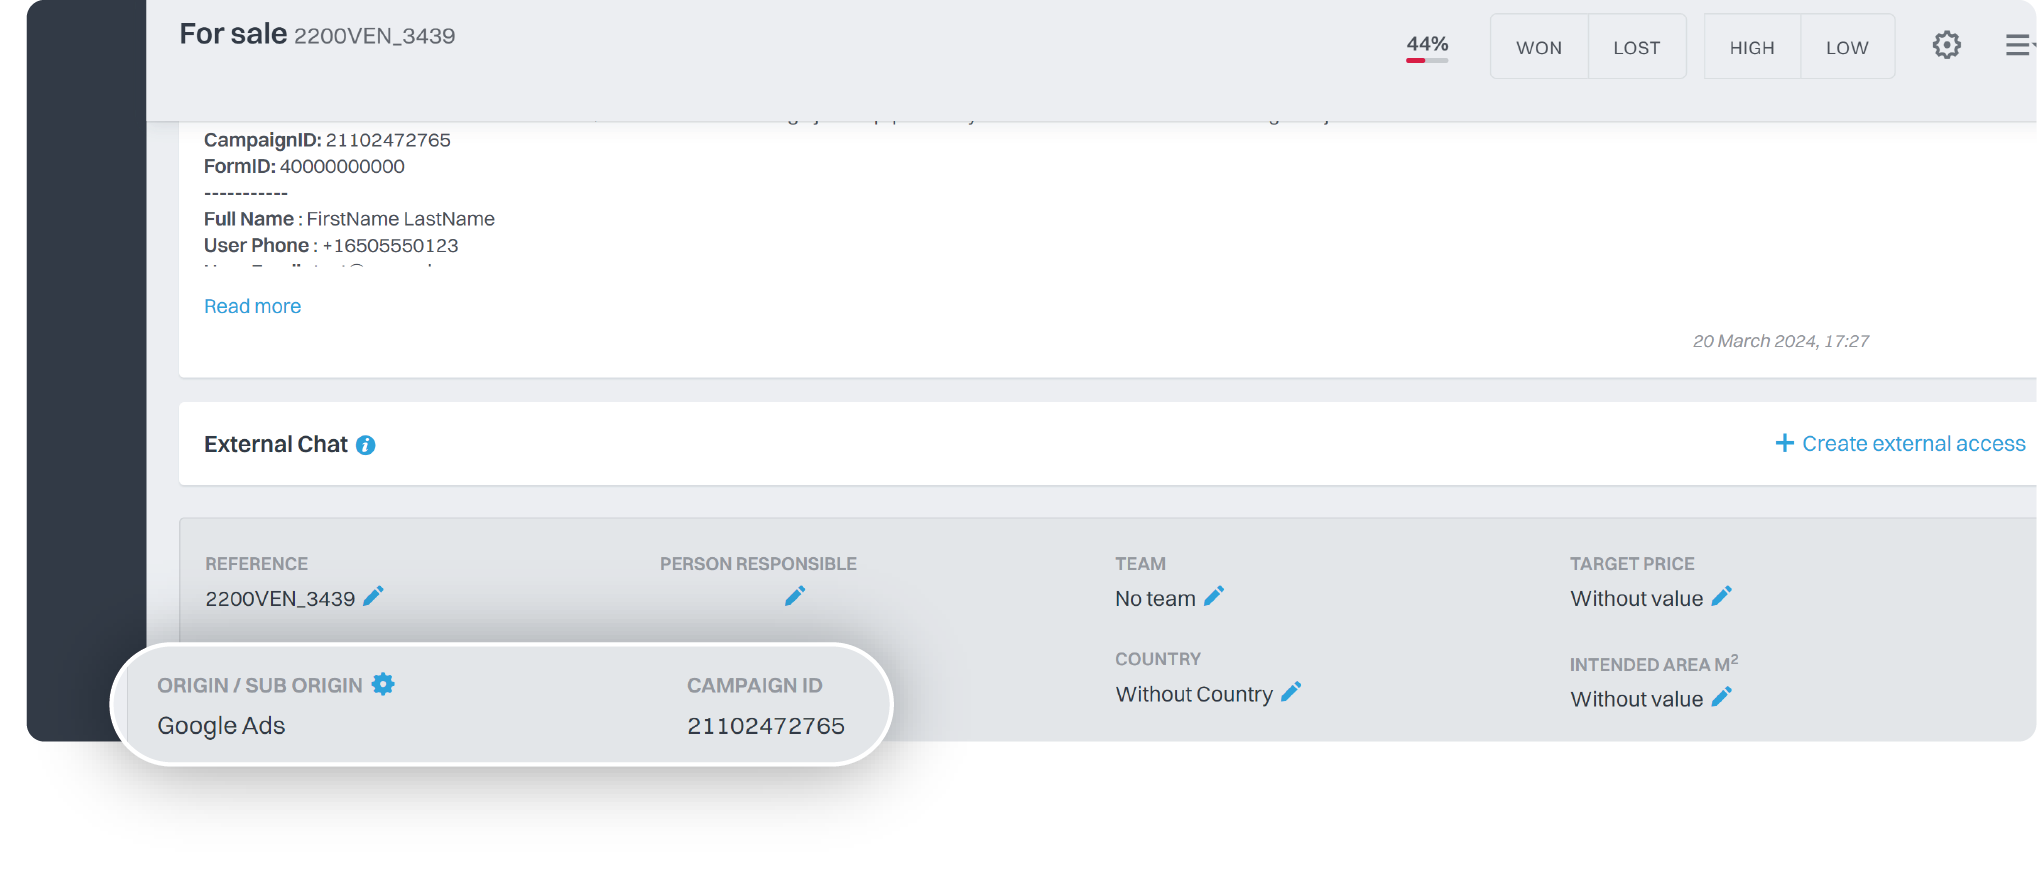
2 – Opportunity
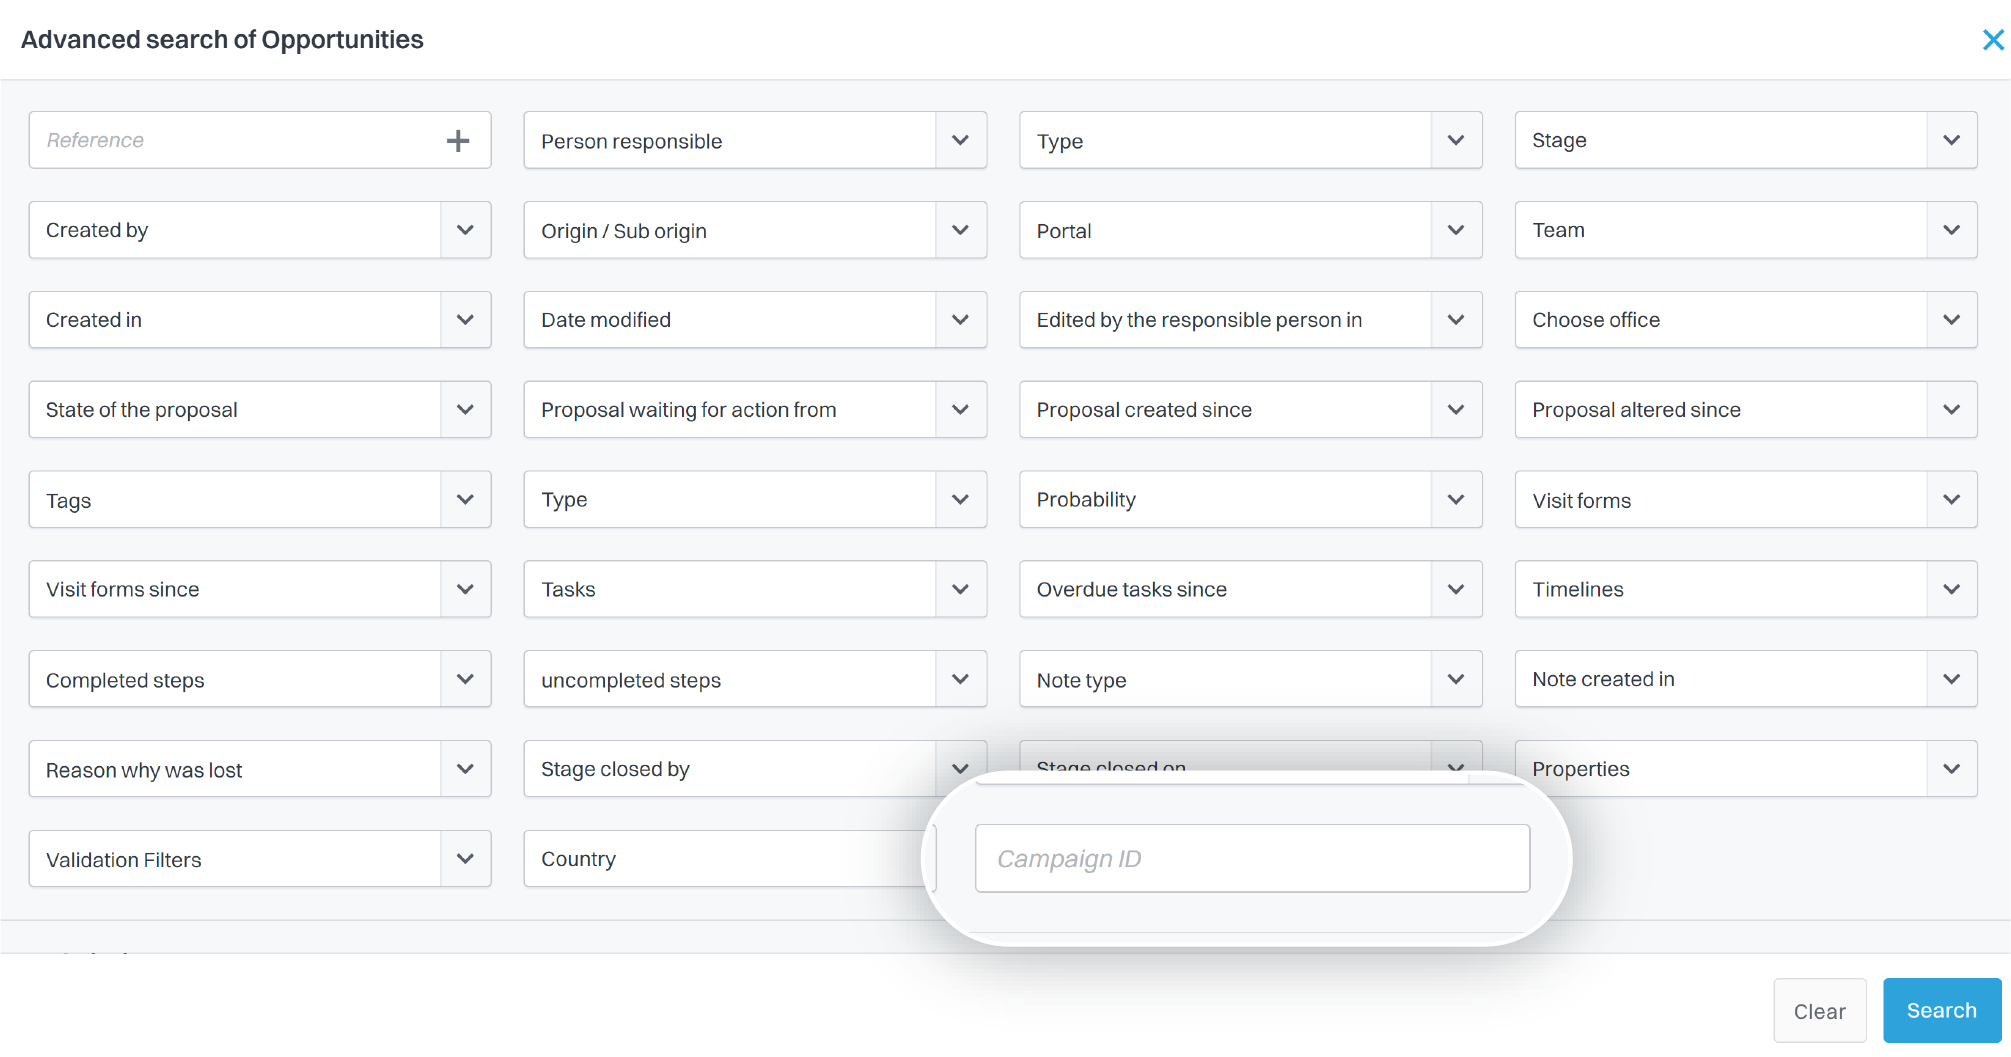
Once the lead has been promoted to an opportunity, a new field will automatically be filled in – CAMPAIGN ID.
Advanced Opportunity Search
A new field has been added to the advanced search so that you can quickly search for opportunities originating from the campaigns you have created.