All-in-one real estate solution


eGO Academy › Real Estate Software › How to create groups
The application manager has the possibility to create “groups” of users and set their permissions. Not having to set permissions one by one makes managing the business much easier. (Ex: Salesforce; Agents, etc …).
To do so, take the following steps:
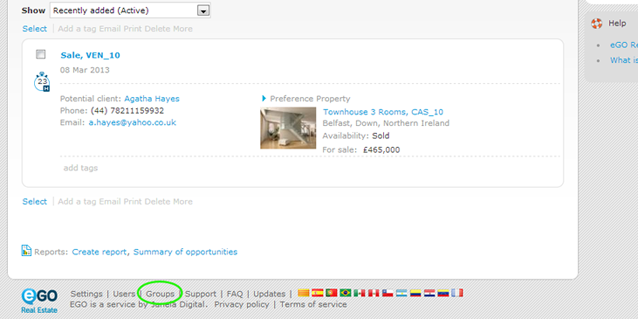
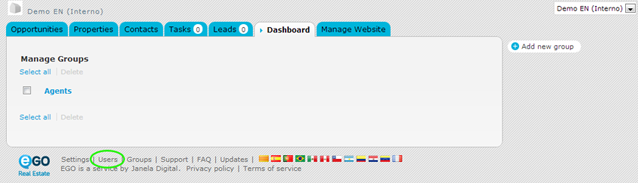
Click the ‘Groups’ option on the footer of the application;
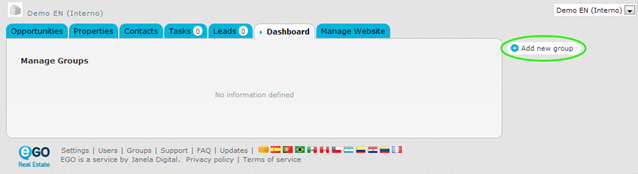
On the right sidebar, click ‘Add new group’;
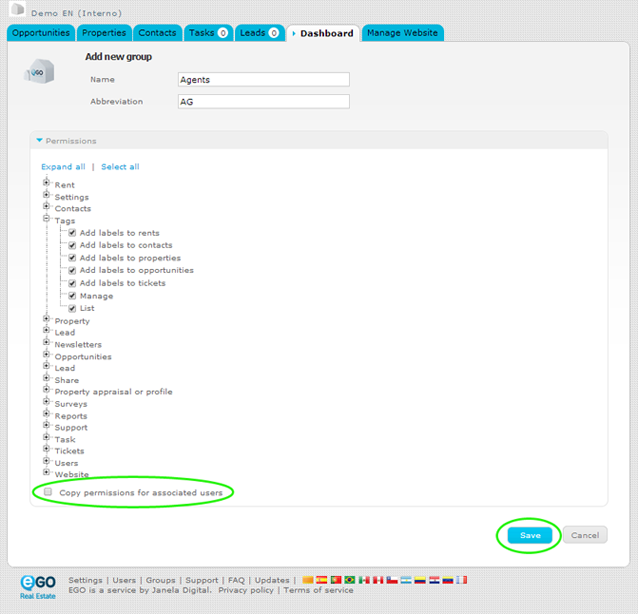
Complete the group information with name and/or abbreviation. Set the permissions assigned to each member by clicking the ‘+’ before each category name. Select only the options you intend will be available for this specific group;
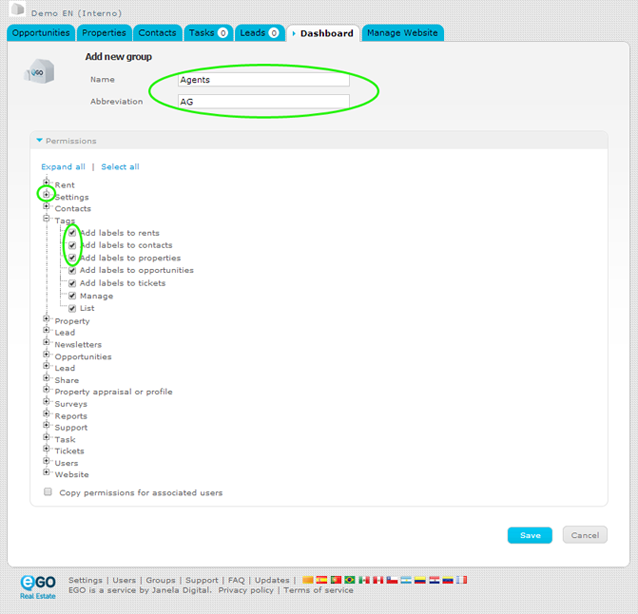
If you want to copy permissions set for all users associated with this specific group, then select the option ‘Copy permissions for associated users‘. Finally, click ‘Save’;
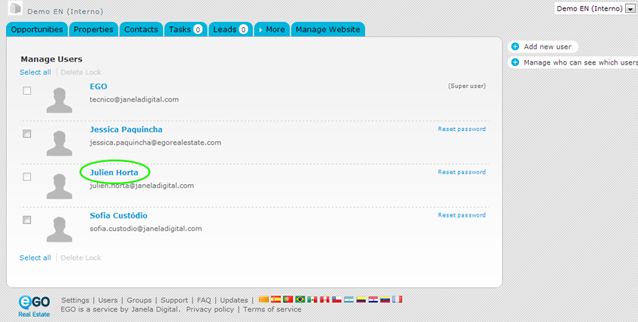
After creating a group, you can associate one or several users. To do so, click the ‘Users’ option on the footer of the application;
Select the user you want to add in a specific group and click on the name to access the contact details form;
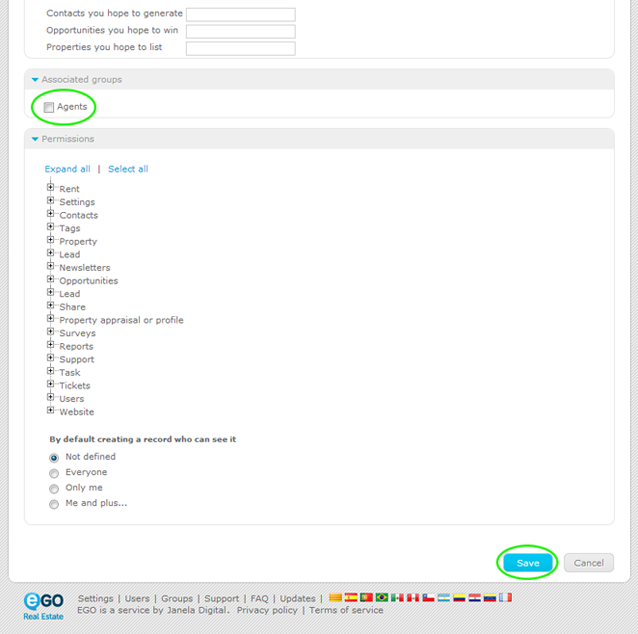
In the ‘Edit contact’, scroll down until the option ‘Associated group’ and select the group, previously created, that you want to add this user to. Finally, click ‘Save this user’;
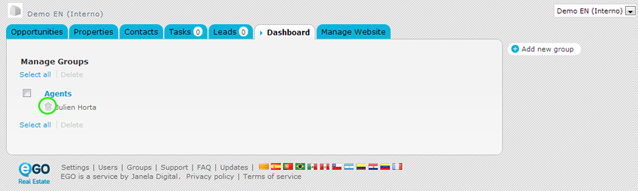
If you want to delete users associated within a group, click ‘Groups’ in the footer of the application and then click the delete icon, visible next to the name of the user associated with each group.